Pages

Saturday, January 8, 2011

Home Stairs REDO Project

Hi everyone! Welcome to my DIY Home Stairs Project!
I have been wanting to do something with my stairs forever! But I was never sure what to do. I only knew that I did NOT want carpet! LOL! Carpet and I don't work well together :) So I decided to rip up my old disgusting rotten carpet and get to work...
Here is what my stairs looked like after pulling up the carpet. They have a million staples and nails all over them. They also had some tack boards that I already pulled up on them.


As you can see after pulling up all the nails, staples and tack boards these stairs are in some need of tender loving care. I thought about how to do that and I almost bought new wood to replace them all. When it it me!

WOOD FILLER!
Oh WOW how I LOVE this stuff!!!! It really works!!!

So I began my long long project of filling in a million holes with this stuff..


After it dried I got out my trusty sander and started to fill my house with dust LOL!
I sanded and filled and sanded some more..until it was smooth and perfect!

After that step was over..I went down to Wal Mart and bought some KILZ - High Gloss Bright White Paint.
And started to paint..
I think I did three coats.

Here they are with the finished bright white paint.

I love the high gloss bright white paint because it cleans up so good! If dirt, liquid or any other object gets on it it just wipes right off.

After the white was done drying I started on to the black paint. I used Glidden Porch and Floor Paint from the Home Depot. I just asked them for black and they mixed it up for me. This stuff is AWESOME! It has a primer and a finish right in it! So all you have to do is paint on two coats and your done! I also love this paint because it wipes clean. If someone walks on them with their shoes and leaves a mess for you, you just get a wet rag and it wipes clean!!!

Now because all of our bedrooms and two bathrooms are upstairs I obviously could not paint all my stairs at once. Oh I wish how I wish I could. But no.. So I painted three at a time. That left enough room for us to still use the stairs. This was probably the hardest part of the whole project.. Keeping my husband, three kids and FOUR dogs off them! (You see why I don't have carpet!)


What I did was paint my three stairs right after everyone went to bed. Then in the morning after everyone went to school I painted the second coat. (you are supposed to wait eight hours before applying the second coat.) After the second coat you have to wait twenty-four hours before walking on them. So by the next morning they were safe to walk on. And then I would do the next three stairs the night after they were safe to walk on. Make sense? So there were always stairs to walk on. I would remove the tape when the stair was safe to walk on.. so I told my kids if there is tape on them DO NOT STEP ON IT! It kinda got confusing but it only took a week so everyone just had to really watch what they were doing on the stairs.


And here they are! YAY! So glad they are done!


And of course I had to add a little vinyl!
                                                                           BEFORE:


                                                 AFTER:
                                            

                                                         I LOVE THEM!!!
                                                    Let me know what you think and if you have any questions let me know!


                 -Heather

Linking to:
UndertheTableandDreaming


Wednesday, December 29, 2010

Fun Snowman/handprint CRAFT with the kids!

The kids are home from school for winter break and bored to death. You'd think they would be playing with all their Christmas presents! LOL! But no. So I thought it was a great opportunity to do a craft with them. With the snow falling outside today I was inspired to do this craft. (I also want to say that I saw this done on another craft blog somewhere but of course I can't find it. So if this was your idea please let us know so we can give you credit for this cute idea!) 
To start off I cut some wood. I used some old fence slats that I had and just cut them in the length I wanted.
Next I had the kids paint the front piece of the wood sky blue (for the background)
Sorry hard to see it in the picture.

 After the blue dried I had the kids dab their 4 fingers (no thumb) in some white paint.
 And then push their fingers down on the wood.
 I then helped them add some extra white at the bottom of the "snowmen" to make a small hill for them to stand on.
 Here is our cute little snowman on their hill.
 Then I just let each of them decorate there little snowman fingers! With a hat, eyes, nose, mouth and buttons!
 Here is Mckenzie's she did great!
I LOVE how they turned out!!! They are each so different! I was thinking I could easily drill some holes in the tops of these and add some wire to hang from the Christmas tree next year.. But for now they are going to sit on my kitchen window sill. Great January decoration! I love these kind of decorations definitely my favorite!
Happy Crafting!


-Heather

Thursday, December 16, 2010

It's amazing what a little vinyl can do!

Cutting vinyl on the Cricut using Sure Cuts A Lot is so much fun!
The possibilities are really endless.
Heather was trying to come up with a cute but simple neighbor gift.
She had a 4x4 wood block and decided to create the manger scene.
This is the end result:
It's amazing what adding a little black vinyl did to this plain ol' wood block!
I know her neighbors are going to love these!

Heather also had a glass block she came across at the thrift store.
It already had a hole drilled into it and someone had put a string of white lights inside.
Super cute but it needed a little something extra.
She found another beautiful manger scene and cut it out and stuck it on:
I love all the intricate details!
It gave the glass block the little something that it needed.
Merry Christmas!

Heather's Front Door

I just had to share Heather's cute front door.
It's so welcoming and it instantly adds style to her whole house!
She painted her door a glossy burgundy then added a white vinyl "Welcome".
The white really pops against the burgundy.
Then she purchased the wreath at Real Deals Home Decor.
It's actually two wreaths that she secured together with wire.

I am also totally in love with her copper barn star which is also displayed on the front of her house.


countdown to Christmas blocks

Heather and Clarissa teamed up for this project.
We have seen a lot of blocks counting down the days to Christmas,
so we had to make some for our own homes!
They are such a fun and cute holiday decor item and kids love them!
It's so fun for them to change the numbers everyday for the big countdown.
To start this project, we cut a wood fence post into two 4x4 cubes.
Then we cut a 2x4 so that it was about 8.5 inches long:
Then we cut out 12 different 3'' squares in coordinating scrapbook paper
and one longer one (8.5''x 1.5" or so)  for the bottom piece:
Then mod podge those babies onto the wood block:
We found a cute font and used Sure-Cuts-A-Lot with the Cricut to cut out our numbers
Ours were 1.5" high. Be sure to use a 6 that can be flipped to be a 9 as well.:
 IMPORTANT:
Make sure you use the following numbers for each block:
Block 1 - 0,1,2,3,4,5
Block 2 - 0,1,2,6,7,8

Now you can either ink or chalk the edges of the numbers, but it's totally optional.
Then mod podge them right on.
It doesn't matter in what order, as long as you put the right numbers on the right block.

For the bottom piece, we cut out the word "Countdown" in vinyl and just stuck it right on.

Now you are ready to display your blocks!
Heather and I went with totally different styles of paper, but each turned out awesome:
and mine:
Our kids have loved changing the numbers everyday!

 
--Clarissa & Heather

Wednesday, December 8, 2010

candlestick holder redo

I was browsing around Ikea a while back and fell in love with some silver candlestick holders.
They were very bright and shiny and looked so classy!
I wanted the candlestick holders, but I didn't want to pay that much for them.
So I found these at the D.I. (thrift store) and decided I was going to attempt to redo them...
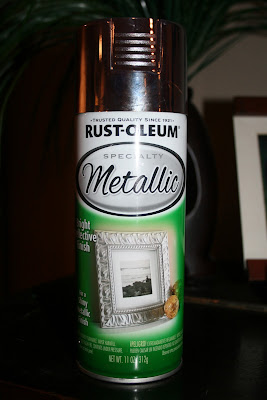
First, I spray painted them a metallic silver:
And they looked like this:
They didn't turn out quite as shiny and brilliant as I had hoped, so I decided to give them a shabby-chic look.
I wiped them down with a glaze that I concocted:
water
brown acrylic paint
a touch of black acrylic paint
a teaspoon of mod podge
Then I wiped off the excess with a rag.
Here is the finished product, displayed on my newly revamped shelf!

BEFORE:

AFTER:
I am so in love with how they turned out!
Thanks for the inspiration, Ikea!

--Clarissa

Linking to:

Tuesday, December 7, 2010

snowflake Christmas wreath

I whipped up this cutie last night with some leftover snowflake ornaments I had.
I bought this wreath at the D.I. for a buck:
I also came across this fabric and grabbed it for also only a buck:
I had a feeling I could use it for something Christmasy!
So I cut it into wide strips and wrapped it around the ugly wreath:
I used lots of hot glue as I went to hold it tightly in place.
After I got it all wrapped, it looked like this:
Not too pretty, right?
Well, this is when I added the green and gold snowflakes.
 I just hot glued them on, every other.
Then, after I got the first layer done, I slipped the opposite color behind and hot glued those into place:
Very simple process and it went fairly quick!
I was surprised how well the hot glue held the snowflakes into place.
Then I spray painted a cardboard barn star that I bought at Michael's, black and suspended it from the top.
I just used an ornament hook and poked it through the fabric.
I added on some long ribbon that I had in my ribbon box, and here it is:

BEFORE:

AFTER:


Related Posts Plugin for WordPress, Blogger...